Pages

Friday, January 27, 2017

Crochet Owl Basket

After much searching I found this pattern in the internet, for free from www.bhg.com. 

Crochet Owl Basket.

Materials:
Two 5-ounce skeins worsted weight yarn: gray (such as Red Heart Super Saver in Grey Heather) I used grey and tan.
Size J crochet hook
Blunt-end yarn needle Gauge:
6 rows and 8 hdc = 3"
Basket height is about 8" and bottom is about 9"diameter.

A glossary of crochet abbreviations is at the end of the instructions.

Crochet the Basket:
Note: The basket is worked in a spiral, so joining rounds is not necessary, Mark beginning of each round.

Rnd 1: With 2 strands of yarn held together, ch 3 (2 chs counts as hdc), hdc 7 times in beg ch (8 hdc). 
Rnd 2: Hdc-inc in each st (16 hdc).
Rnd 3: *Hdc-inc, hdc in next st; rep from * 7 more times (24 hdc). 
Rnd 4: *Hdc-inc, hdc in next 2 sts; rep from * 7 more times (32 hdc). 
Rnd 5: *Hdc-inc, hdc in next 3 sts; rep from * 7 more times (40 hdc). 
Rnd 6: *Hdc-inc, hdc in next 4 sts; rep from * 7 more times (48 hdc). 
Rnd 7: *Hdc-inc, hdc in next 5 sts; rep from * 7 more times (56 hdc). 
Rnd 8: * Hdc-inc, hdc in next 6 sts; rep from * 7 more times (64 hdc). 
Rnds 9-17: Hdc in each st around (64 hdc).
Rnd 18: *Hdc-dec, hdc in next 6 sts; rep from * 7 more times (56 hdc). 
Rnd 19: *Hdc-dec, hdc in next 5 sts; rep from * 7 more times (48 hdc). 
Rnd 20: *Hdc-inc, hdc in next 5 sts; rep from * 7 more times (56 hdc). Rnds 21-26: Hdc in each st around (56 hdc).
Sc in next st, sl st in next st to finish off. Fasten off, and weave in ends.

Make the Eyes:
Note: Each eye is worked in a spiral, so joining rounds is not necessary. Mark the beginning or each round. First  Eye
Rnd 1: With 2 strands of yarn held together, ch 2 sc 6 times in beg ch (6 sc). 
Rnd 2: *Sc 2 times in each st; rep from * 5 more times (12 sc).
Rnd 3: *Dc 2 times in each st; rep from * 11 more times (24 sc).
Rnd 4: *Dc 2 times in next st, dc; rep from * 5 more times, tr, dtr, picot; fasten off. 

Second  Eye
Rnds 1-3: Rep First Eye instructions.
End 4: Picot, dtr, tr, *dc, dc 2 times in next st; rep from * 5 more times, hdc, sc, sl st to finish off eye; fasten off and weave in ends.

Add Eyes to Basket:
Position the right eye on the basket at the point of the last st. Using two strands of yarn and a tapestry needle, tack down the center of the eye; using the center hole as a guide, bring the needle up through the center and then back down in the first round of stitches. Continue until center is secure.
Using two strands of yarn and the outside stitches of the eye, tack down the eye securely, leaving the picot stitches unsewn. Weave in all ends. Repeat with left eye.

Add the Beak:
Using two strands of yarn and long straight stitches, embroider a beak between the bottoms of the eyes.

Crochet Abbreviations:
beg beginning 
ch   chain
dc double crochet 
dtr  double treble
hdc half double 
crochet inc   increase
lp    loop 
rep   repeat
rnd(s)   round(s) 
sc single crochet 
sl st  slip stitch 
st(s)   stich(es)
tr treble crochet 
yo  yarn over
hdc-inc, dc-inc, sc-inc  work two of the designated st in one stitch.

hdc-dec (Yo, insert hook in next st, yo and draw up a lp) twice, yo and draw through all 5 lps on hook. 
picot ch 5, sl st in top of first st.


Saturday, August 27, 2016

FOBS

Found a easy and fun project for my Christmas gifts, fobs. I am already planning all the different designs I can make, dogs for E., R. and S., fishes for V., sports for the guys, something with French motive (or Canadian) for my Canadian friends...so many possibilities! The fabric designs will have to be small to be be visible on a 1 inch strip. 

Very easy, made 15 in 1 1/2 hours at an average of $1.45 each.


You will need:
Fabric strips, 10", 8"or 6"x 2" for large, medium and/or small fobs. Fabrics can be purchased for $0.97 a fat quarter. It should give you +- 24 strips.


Double sided fusible web strips cut of same length x 3/4" width (or hemming tape). Fold the long edges of the fabric by 1/2"so that it meets in the middle. Iron web into folded side of fabric.

Cotton webbing 1 1/4" wide or if you can't find it near you, use a dog leash (nylon webbing, same width) cut to length (at WalMart $9.97 for 20 ft and comes in 3 colors). You could get about 30 strips from one leash.


Key fob hardware, pack of 5 for $4.97


Candle to melt the edges of the nylon web to avoid unraveling.  

Bend the webbing with the fabric on the outside and hold the ends together. Insert the ends into the hardware and press it with the pliers (use a cloth between hardware and pliers to avoid marking it). Attach the ring to the fob and you are done.


For larger quantity, check the web for fobs hardware and web wholesale.


Friday, August 26, 2016

Zippered pouch.

Still with fabrics, trying new things, like this zippered pouch from a crafts magazine.


The MOST complicated instructions I have ever encountered! Not making another any time soon. Moving on to a new project from the same magazine, we'll see.

Quilts and pillow people

In between my crocheting I also worked with fabrics, making:


Two queen size quilts


Two twin size children quilts


and two pillow people

Crochet

I devoted the first few months of my NY time to learn to crochet. I learned to do a chain, single, half-double and double crochet and back-post single crochet. I also learned how to make a magic ring, crochet on the round and also on the opposite side of a chain. I made a few things to practice these stitches.

36 x 36 baby blanket with picot edging

a small (7"diameter basket) and some washcloths 

Crocheting is enjoyable and a good past time but I can't find any good use for it and yarn is more expensive than fabric. My kids and grand kids would rather have a quilt than an afghan, that little basket will be collecting dust somewhere and  the washcloths are for my husband, the only one who uses them.

All in all, it was a good experience and I learned something new. I might still make a few things here and there but I will stick with my favorite, fabrics!

Monday, May 16, 2016

Flip flops summer wreaths

Saw this cute idea fort a flipflop wreath in Pinterest and had to make one.


Needed:
24" wire wreath cut in half
8 medium size (7-10) flip flops in bright colors
glue gun
summer motif decorations (from the dollar store)
ribbon
wooden letters to spell "welcome", "good day" or the saying of your choice. No more than 8 letters long or you will have to change the design.

Cut wire wreath in half, fold ends with pliers and wrap it with ribbon for safety.
Insert node of flipflop (between toes) into top area of wreath, tie it with floral wire.
Apply hot glue to 3rd and/or 4th wire, apply pressure to secure till dries. This will keep the flip flops in place.

Add ribbon for hanging

Turn it to front and apply decorations and lettering as you wish.


Monday, April 4, 2016

Terracotta pots lighthouse

My second project of the month was a terracotta lighthouse made of, guess, terracotta pots and saucers.

The project is easy but my quest for perfection made difficult. Hint: choose a easy design, there are plenty of pictures of lighthouses in the internet but I had to pick the hardest one...the spiral!

You will need:


  • 1 large terracotta saucer for the bottom, something that when flipped over will accommodate the rim of your first pot.
  • 3 terracotta pots in decreasing size (as you like). Try it at the store to see the fit.
  • 1 small terracotta saucer to fit the top pot.
  • 1 battery operated votive candle (dollar store 3 for $1) or if you don't feel like turning it on and off  every day, do it like me and get a solar light (Walmart $1) and cut off the bottom stick.
  • 1 tube of GE silicone caulking (check date, ready my previous post)


Set up your pots as seen in the pictures (make sure to add plenty of silicone as the pots are uneven and may not touch the previous ones all around).

Wait for it to dry. Paint it, add details, etc. Set it with a clear lacquer if you want. PS: I also used an white primer before my painting.

Glue light on top, add embellishments and you are done. It came out very pretty and the light really works.


Almost done. 


The little fences around the top and the doors came from a plastic soldiers set but you can use anything or make windows instead of doors.


The "glue"used.


Sunday, April 3, 2016

Garden balls.

Two more projects done. Garden decor bowling balls.

Saw this project all over the internet, so I can't tell where it came from.

I used two bowling balls donated by a neighbor, they were designated to the trash. One ball was golden and the other blue. I covered the golden with pennies (collected in jar for many years) and for the blue one I used green/blue/white glass pebbles from the dollar store.

One good tip I found was to use GE silicone instead of glue and to make sure it was a fresh tube. I learned the hard way, after spending my morning gluing my pebbles, I came back to the craft table to find them all over the floor!

So here is how it goes:

Prepare you bowling balls by cleaning it well and sanding it a bit with sand paper. Clean it again.

Get your silicone and pebbles/pennies ready. Start from the top and work your way down to about quarter way (you may need to put masking tape or something to prevent it from slipping down).

Wait till dry, Flip over and start on the other side.

Wait till dry again and you will be able to work in the middle section with the dry ones holding it in place.

I cover the holes with corks (good use of my wine corks collection) because I didn't want any garden critter making that a home, I live in Florida where small garden snakes and frogs abound!

Easy!

GE 100% silicone tube good for one ball or you can use the larger tubes and a caulking gun.


Where the date is. Fresh tube.

Glass ball, used about 3 1/2 bags of pebbles from the dollar store.


Pennies ball. 

So there you have it. Now go looking for those old bowling balls and save them from the landfills. 


Sunday, January 3, 2016

Arm Knitting

Been out of the blog world for a while. Christmas was a busy time but I discovered a new craft that I am obsessed with it: Arm Knitting. Made 5 infinity scarves already. The first one took me a while because I missed a loop and had to start over again but after that my timing is getting better at 1 hr for a longer/wider scarf and about 45 minutes for a smaller one. It is a pretty easy craft but you are literally tied up for the duration.

Here is the first two I made (photo is blurred to protect the innocent)

Close up 


The best instruction I found was in YouTube by Crafty Gemini and here is the link: Crafty Gemini

Hope you have as much fun with it as I had. Enjoy!

PS: The beautiful, thick, warm and soft yarn used was Bernat Blanket

Monday, October 26, 2015

Mesh Wreath

I have been asked by a friend to teach her how to make a mesh wreath? They think I know everything, I don't, but I do know how to google it. So I found this one for a puff wreath from the Old Time Pottery but it was a video, so I will added here until I get a chance to make one and take picture of each step.

Mesh Wreath by the Old Time Pottery.

This is what a "Puff" Wreath looks like:


And here are the instructions I wrote from the video:

Wire form 24”
1 roll of 21”deco mesh (10 yards)
1 roll of deco mesh 10”for accent color
5 yards of 2 ½ inches ribbon for a bow (or bows)
Other embellishments as needed
18 pipe cleaners, folded in half

Tie the pipe cleaners to the inside ring at the cross bars

Now tie more pipe cleaners to the outside ring about halfway between the cross bars. You may want to use a glue gun to keep them from sliding.

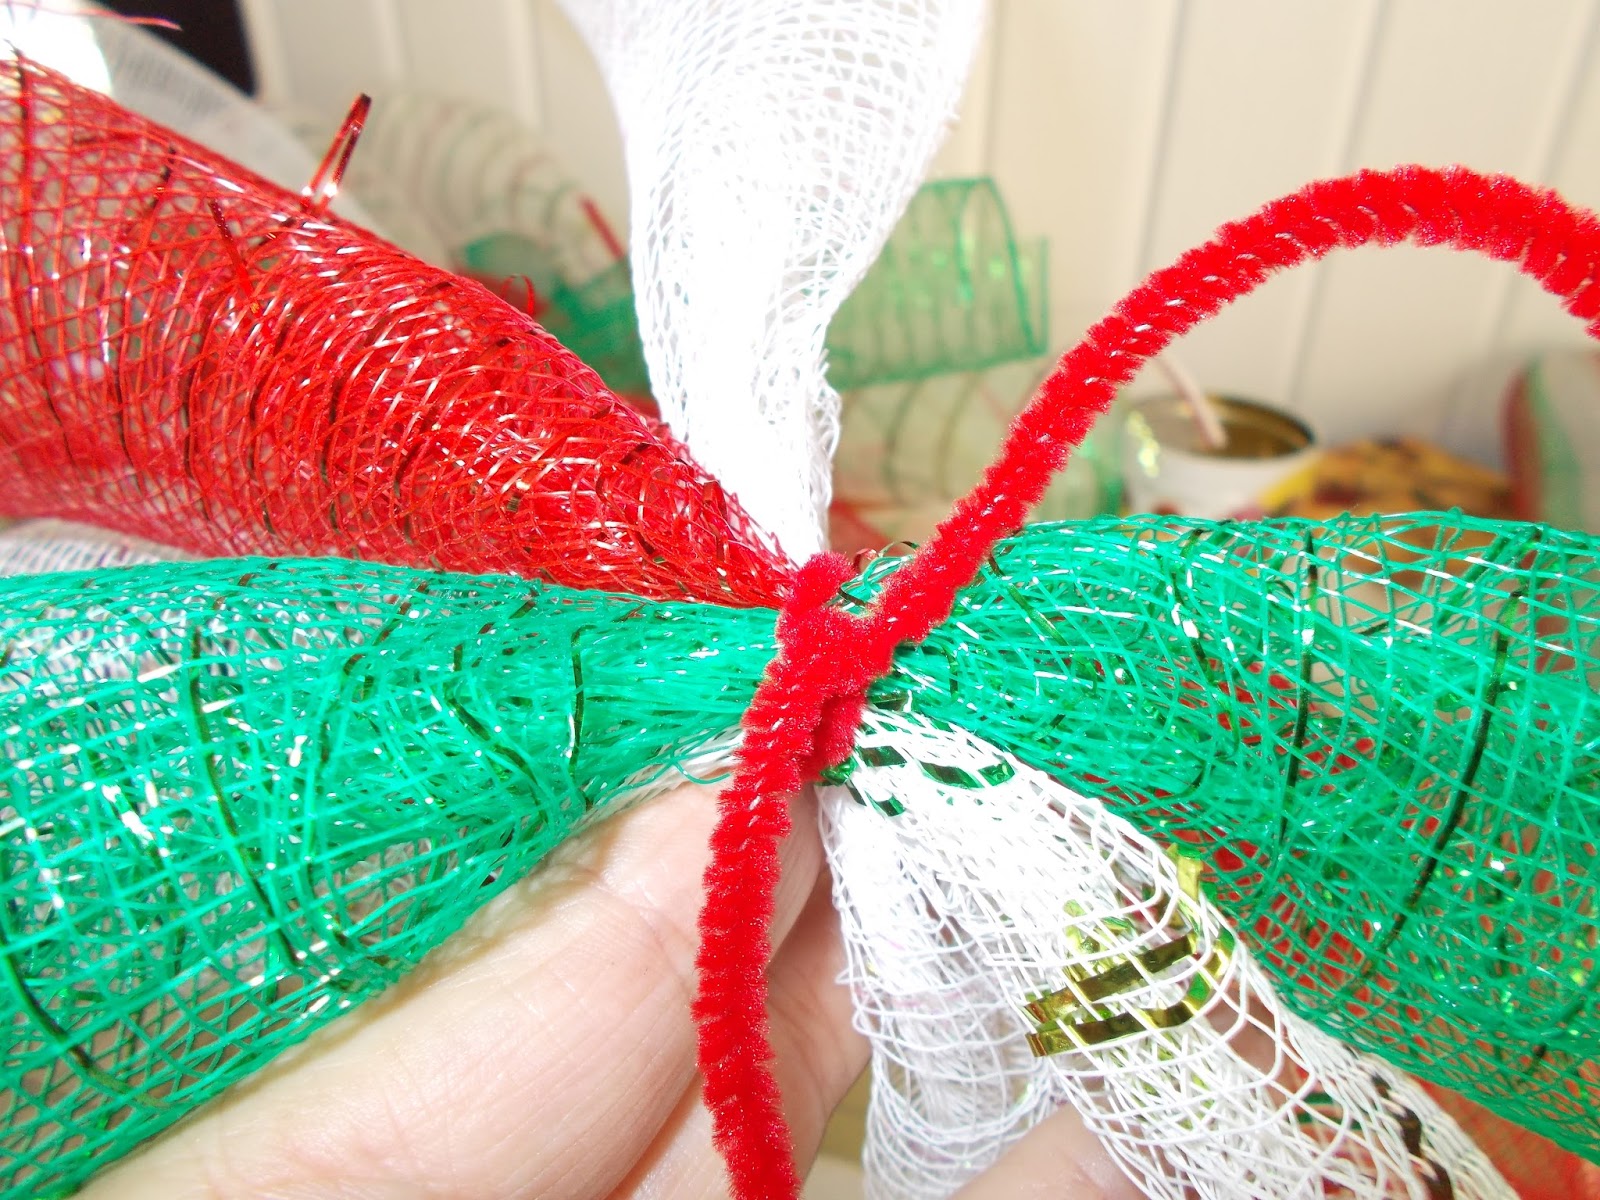
Start with a 3-4 inches tail, bunching together the deco mesh starting in the inside ring, continue bunching up the mesh at about 12 inches and tie it to the next pipe cleaner. Tie them together and fluff it up. Continue on till the first pipe cleaner, tie it. Do not cut.

Start now on the outside ring the same way. End at the cross over pipe cleaner in the outer ring. Cut a 3-4 inches tail.

Now do the same with your accent mesh, gathering a tail and puff at every 6”. Start on the center ring attaching it to the same pipe cleaner. Continue alternating inside and outside ring going around twice.

Fluff up the puffs and hide the tails by pulling thru the back and up and down the ring.


Make sure all the pipe cleaners are secured and use them to attach your embellishments or turn them to the back and cut it.


There is also a "Curly" wreath which instructions were already on a PDF file and I am attaching here:
Miss Kopy Kat Blog - how-to-make-curly-deco-mesh-wreath

She uses the entire width of a 21" roll of mesh and 4 colors.


A different version (on a very long and boring video) is done with 10"rolls and 3 colors. They call it "Ruffled"Wreath. This one is from UnderATexasSky.com. Here is the short version of the instructions:

Uses 3 - 10 inches rolls
2 of the same ribbon width, one roll solid another with a design.

Cut 12 inches from each mesh. (12 cuts of each color)

Gather the pieces in the middle and attach it to the pipe cleaners alternating the colors.

Starting again from the beginning, use the same pipe cleaner opened (do not add on top of a twisted pipe cleaner)

Repeat with the 3rd color.

Start all over again in the inside ring

Cut ribbons to about 12 inches, dove tail the ends, scrunch in the middle and attach it to the pipe cleaner. Do the same to another ribbon and attach it on top of the previous ribbon on a different direction.


Now attach any embellishments, ornaments etc.


Here is one I made:


It came out very pretty but I did not like working with the mesh as much as I thought I would. It frays too much!

I also made a Santa Claus head and a swag. Here they are:


Another easy wreath I found was made with a wire hanger and tule instead of mesh. The video is by Nica Wolmack and she gives good instructions but I find it easier to follow written directions.


I will try to write up instructions for this one also.